Sunday, December 21, 2008

Finger in the Dike

A few days ago I got a PM from a friend, Steve Hansen (Blues Safari blog). He and I are both working on 1966 Safaris. We are also at about the same stage in our repairs. He asked if I had any suggestions for keeping water out of the trailer. Well it just so happened that I had started doing that very thing the day before. I wrote back to him that I would put that process on this blog so here we go!

First, these are the products I plan on using, along with the vulcam which is not pictured.

I found this at a local auto parts store. It will be used on all of the interior joints, just like the stuff airstream used on the end cap segments.

This is the area along the front street side window. Its between the window and the skin.
You can see in these photos that I got some special rivets. They cost a lot more money but they are spares left over from the Wally Byam gold trailer. I know the salesman would not lie to me, would he?
This is the same area with Acryl-R applied.

You can see in some of my previous posts that almost the entire street side was repaired with Olympic rivets. Every one of them leaked. After replacing all of them with bucked rivets, I hit it lightly with a wire brush.
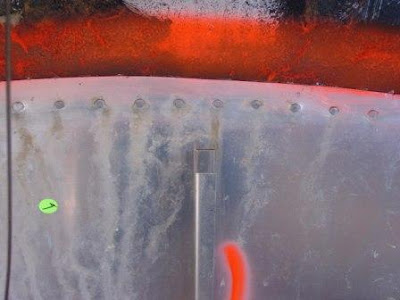
I then gave the area a light coat of the "Mar-Hyde" rubberized coating. I really like this stuff. It was about 6 bucks a can and I think 3-4 cans will do the entire trailer.

This is an area above the entry door. I am not sure how I got moisture in this area but I wire brushed it clean.

I used the Alcoa Gutter Seal on it. This stuff looks the same as the Acryl-R but costs more.

Finally, Toby was getting an attitude since he did not get any "Face time" in the last few posts. Santa came by a little early and brought him a squeaky squirrel.

As you can see, He is not in the mood to share!
Merry Christmas my friends!!
NUTZ

Monday, December 8, 2008

Dometic Vent Repair

A few months back I took some photos of the ABS vent for my Dometic refrigerator. The vibration cause by the bad axles had caused the vent plastic to crack everyplace a rivet had been placed. Old age was a factor also!

One of the PO's had also drilled a 1 1/2 " hole in the front of it. I assume it was there to help dish towels to dry. My vent is enclosed in a cabinet and there is a towel rack inside the cabinet. Of course, this also allowed combustion fumes into the living space which is really stupid!!

I have outlined the repair in previous posts so I will just give a quick summary here. I placed clear shipping tape over the edges to hold the broken pieces in place during removal.
I then removed the vent and opened up the cracks with a Dremel tool.


I had spare window screen left over from replacing the screen in the trailer and the house. For the trailer I used aluminum. For the house I used the dark grey fiberglass.
I found the aluminum a little better as I could cut a 1 inch wide strip, fold it in half and slip it over the edge and it would stay.

Then I applied ABS cement from the big box store. I let it dry over night then reapplied a second coat where needed. The cement hardened up to the same as the original plastic.

I finished up by spraying it with a coat of Krylon Fusion paint for plastic.

It will not be seen when installed but I didn't like the black glue on the off white vent. I think this method works very well and I would not hesitate to use it for any other ABS repairs. If it were to be visible I would apply a thin coat of Bondo, sand then paint.

In summary, would I recommend this?

Absolutely! A well known vendor sells a replacement vent for almost $400.00 plus shipping. My cost was some some scrap window screen, $3.69 for a bottle of glue and half a can of paint I already had. Oh yeah, I have to figured about four bottles of Sierra Nevada Pale Ale.