Sunday, November 30, 2008

Indiana Jones and the Trailer of Doom

Continued replacing the Olympic rivets this weekend. This brings the total so far to over 250 rivets. When I look at the trailer with all of these Cleco's sticking out I am reminded of a scene in the Indiana Jones movie where he is going through a cave and these darts start shooting out of the walls at him!


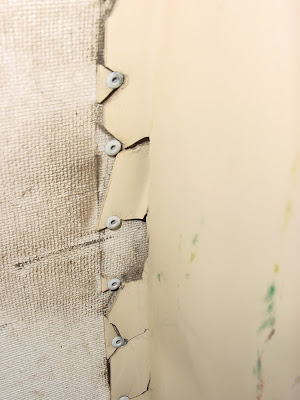
After seeing the inside of the walls I know that I will never install an Olympic rivet without covering it in vulcam or some other sealant. You can see that everyone of them is leaking. The orange paint is what I added to help my bride find the areas of rivets we were going to buck. These shots were taken after I put in the bucked rivets.


A few hundred more rivets and I can move on to the next stage!!

Monday, November 24, 2008

Scab Removal

While waiting for the wife to do a little rivet bucking, I thought I would do a little seam cleaning and sealing on the inside. I had some scabs on the inside skin from water intrusion.

The first picture was taken to the right of the entry door. I have a few spots that look like this. I find it hard to believe that moisture is wicking up through the seam. I tend to think that the water is coming in someplace else then traveling along the seam and causing the corrosion.

I cleaned the corrosion off with a Stainless Steel wire brush then ran a pick along the joint. Then I blew out the loose stuff and applied Acryl-R using the cool little application tool.


I think I have mentioned that I am a "Tool Whore". That was one of the main reasons to tear into the Safari, getting new tools! Here are a couple of shots of the pick set I used. I figure after I am done with this project, I can use the straight one or floor testing (Rot) and the hooked ones for "O" ring work.

Saturday, November 22, 2008

Darth Vader comes to Chico

Well at least his helmet did. Removed that last piece of interior skin then pulled out the front end cap. As usual, Toby the wonder dog was there to help.


Found a small rodent nest but no rodent bodies so far.Next step will to remove the shower/sink combo and the toilet.


I made a new discovery. At least new to me. Crazy glue works to stop the bleeding when you get cut with a sharp edge of fiberglass.

Thursday, November 20, 2008

I tried to tell him

Don't get in a fight with the raccoons. They usually win! I guess that's why even though his name is Toby, I call him "Knucklehead"


But you know, he really had a good time!

Friday, November 14, 2008

The Chico Olympics part deux

Yesterday I took down some more sheet metal on the inside. It was such a nice day I decided to go outside and do some work on the Olympic rivets. I found that a light tap with a nail set to the center of the rivet, you get that great little belly button. It is perfect for drilling out the rivet, and you know you are in dead center.

The only problem was that I only have 100 5/32 Clecos!

This job will have to be done in stages. I have to wait for the weekends for my wife to be home during the day and buck rivets. I have found slight corrosion under each rivet head and no sealant. The entire side of the trailer is more like a strainer. It is no wonder this thing leaked. The access door for the fridge had no sealant at all.

As you can see by the different colored Cleco's, a few of the holes were bigger than 5/32.
I gooped it up with Vulcam and riveted it in. It was one of the few places I could reach inside and buck the rivets myself. I ran a bead of Vulcam around the frame and under each rivet head. I am gonna make sure this baby does not leak. Oh well, playing with the rivet gun is pretty cool!

I thought for my first time, it came out pretty good. Especially since I used the wrong rivet set. 3/16 is really close to 5/32. Oh well, next time will be even better.

Tuesday, November 11, 2008

Now for something different

I read several blogs,as I assume the rest of you do. Recently Frank has been showing off his excellent woodwork. Rob his huge woodpile and lovely home (well barn!)
It has been awhile since I have done any woodwork. I know that will change when I get to that part of the Safari. I don't normally cut wood, I am lazy and have it delivered already cut. What I do is burn wood. After retirement I started a custom cooking business specializing in BBQ. I am not open to the public and work by referral only. I enjoy making things you can't normally find anywhere else. This was last nights dinner for my wife and I.
I started out by taking a regular white onion and peeling it. I then cored it out but not all of the way through. I placed a beef bullion cube in the bottom and then filled it with butter then sprinkled a little dry rub on top. Wrapped in foil and placed it on the BBQ at about 250deg.

Next step was Pork loin. I took a long (9 inch) knife and cut a slit about 1 1/2 inch wide almost the full length of the loin. I then inserted a home made sausage into the slit. This step is not for the weak of heart. I did not photograph it. You can thank me later!.
The loin was rubbed down with my own dry rub and placed on the BBQ along with a handful of Cherry wood. It cooked for about 2 hours at 250 deg. The last 45 minutes of the cook I brushed the surface of the loin with Pineapple-Habenaro jelly (Yes Marcus, that stuff from Texas!)

The loin is wrapped in foil for about 1/2 hour after removal from the cooker to rest and the juices to redistribute. The onion is simply unwrapped and put into a bowl and sliced. It is like the most intense French Onion Soup you have ever tried.
I took some plain old russet potatoes and cubed them up. Tossed them in a bowl with olive oil, basil, oregano,garlic, salt and pepper. I also tossed in some with onions then put the whole thing in the oven on a cookie sheet for about 1 hour.

My wife doesn't like meat that much but she went back for seconds last night. I thought it was OK but I will try different sausages, or maybe apple pie filling.

My wife still works. When she comes home at night and finds this for dinner, she doesn't give me any crap about buying an old trailer or lots of tools to work on it. I hope you enjoy.

Saturday, November 8, 2008

Sucess!!!

I am very happy how the experiment with the ABS cement went. After curing all night the patch cured up hard and strong.
If you look back a few posts, you will see that my fridge vent was cracked around the edges where the rivets were and it was leaking combustion gas and dirt.

Before I drilled out the rivets, I placed shipping tape over the rivets and pressed it down to secure the small pieces of broken ABS plastic. I then drilled through the tape and rivets and removed the vent.

I have already documented the repair of the hole drilled in the vent. This is how I did the edges.
I used my Dremel tool and a burr to cut a vee in the cracks.

I then brushed a coat of ABS cement into the cracks to weld them up. This still left the problem of the broken and missing pieces. I had some leftover aluminum window screen from replacing the screens on the windows. I cut this about 1 1/2 inches wide and bent it around the lip. I held it in place with blue tape where required. I then started brushing on layers of ABS cement. This should harden up and the imbedded screen wire should secure the rivets and thin plastic along the edge.

This is where I left it for tonight. Tomorrow I will flip it over and do the riveting surface. I will post more photos later.

Thursday, November 6, 2008

More Floor Repair

Nothing long winded about this one. Pretty much like the other repairs I have shown. The only real difference in this one was setting the blade a little too deep at first. DOH!! Make note of that one Marcus! Got that taken care of and removed the damaged wood. I used my Sawzall to remove the elevator bolts.


A little dab of POR 15 and a few splice plates and we are ready. The splice plates are 4 inches wide and I apply a couple of heavy beads of sub floor adhesive then screw them in.

I will pop in a new piece of plywood tomorrow after the POR 15 cures. Sub floor adhesive will go on the splice plates and ribs then bolted down. Check one more off the list. Unfortunately, the list keeps growing.

Worlds Smallest Skylight

I continued removing interior skin, throwing away stinky yellow fiberglass insulation and general cleanup. So far, no signs of mouse droppings. I looked closely at areas where I could see water had dripped down on the inside of the skin. Digging through all of the crap in my shop I came across a package of stickers my wife used for price tags at a garage sale. These turned out to be just perfect for marking the spots that need attention.

The first shot was a missing rivet (or the worlds smallest skylight!) This is at the very top of the trailer right behind the bathroom vent.


I also marked areas of corrosion that show water leakage.

So far, I still have more interior to remove, all leaks can be traced to Olympic rivets or poor repair methods. It appears where the repairs were done with the Olympics, I don't see much in the way of sealant such as Vulcam or anything else.

Notice the nice wire nut splices that were behind the wall. This is a 120 volt line. Can you imagine if one of those wire nuts had vibrated off! The entire trailer would have been hot and I would have no idea where to begin looking.

Fridge Vent Repairs

I did a quick Google search last night on ABS repair. I found a site (don't remember which one) that recommended using ABS cement. I picked up a couple of cans today and started playing. For some reason, somebody drilled a hole in the vent. App. 1 inch in diameter. This was in the area where there was a towel rack. Maybe they wanted the towels to dry faster! I don't like the idea of combustion gas inside the coach so I decided to practice on this one first.


I placed blue tape over the hole on the front. Then gave a light coat of ABS cement over the hole and tape.


Then I cut and placed a square of aluminum window screen over the wet cement.

I then put more cement over the top. I will check it tomorrow to see if it works out and post the findings.

Monday, November 3, 2008

Single Use Cleco's

Marcus (UTEE 94) used that line and I liked it so much I stole it! I really hope he updates his blog someday. Lots of us really miss him. I think the PO's of this Safari owned stock with the Olympic Company, or at least should have after these repairs.
This is the patch over the area where the tv antenna was. 21 olympic rivets to cover a 1 inch hole!!

As I pulled down the interior skin I started to find a few leaks.

It was raining at the time.


After taking a close look outside, I saw some things I should have noticed sooner, not that it would have made a difference. It was love (lust) at first sight.


Rivets should not have belly buttons.

They should not have pupils either.

Some times the most comfortable place is right on top of the air hose for the drill. Anything we can do to be in the way!


Just a few more shots of Olympics before I go to bed.
Most of the Oly"s are in the horizontal ribs but there are some in the vertical's as well.
More to follow.
Good night my friends.

NUTZ

Tickle me Sh*tless

I'm not sure why, but this just amuses the hell out of me. After the third time watching it, I noticed the person behind the sliding glass window with the scissors. Sorry but you have to cut and paste the address.

NUTZ

http://my.break.com/media/view.aspx?ContentID=260348

Sunday, November 2, 2008

The Chico Olympics!

It would appear that someone really liked Olympic rivets. I have used them to attach things like patches and the rain drip caps, but the entire side of the trailer is held together with the damn things.
I looked around on the outside and sure enough, the entire street side aluminum is attached with olympic rivets. I have yet to find any sign of Vulkem or any other sealant. Hopefully, that is where the leaks are. I have three tubes of Vulkem on hand and the number for Vintage Trailer Supply on speed dial.
I remember a long time ago I was reading Frank's blog. I am so gratful to have access to the material on this forum. There is no way I would attempt this project without the information others have posted. Anyway, Frank had gone on a rant about Olympic rivets and their misuse. That stuck with me. Shortly after, I found this set on EBAY and won the bid. I guess I am going to get to learn how to use them!


This is the handle of a four inch screwdriver. Notice, it is just the handle, not the shaft. That part went thru the floor. Gawd this stuff is fun!!